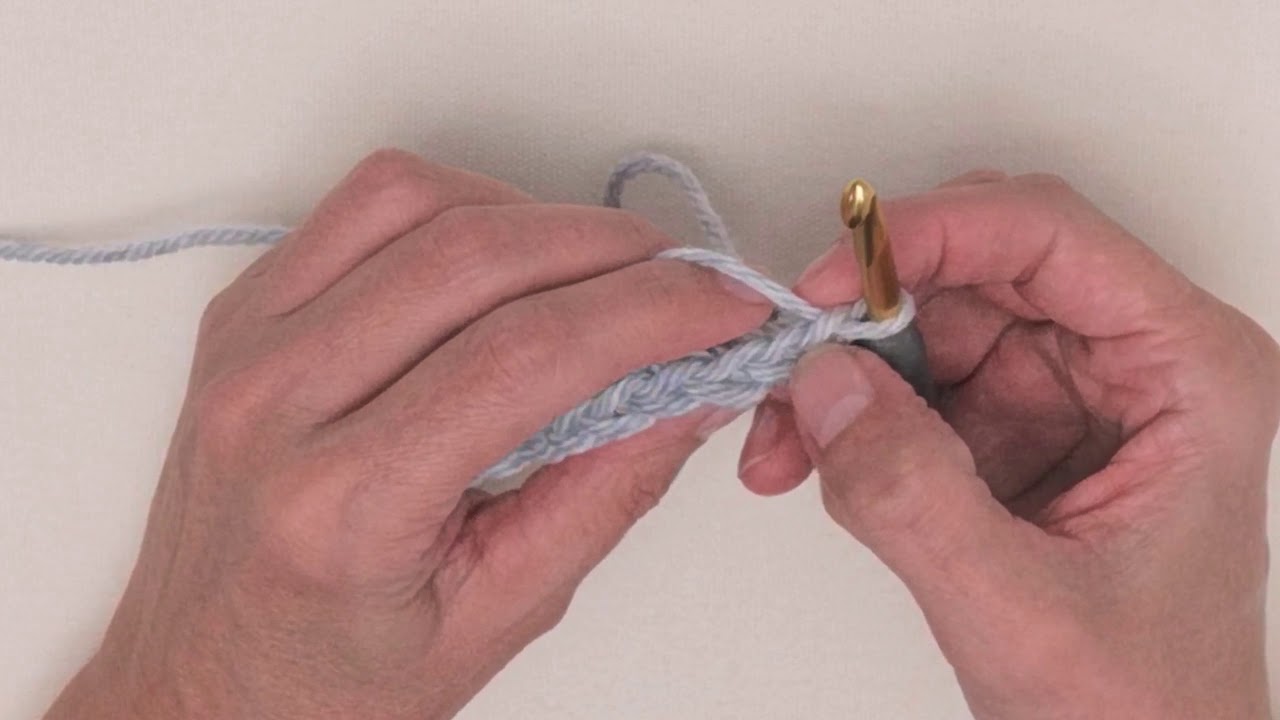
To continue on to the next row of slip stitches, you would need to chain 1 and then turn your work. Then, turn your work so that the hook is facing the opposite direction. By placing your hook in the correct position, you’re setting yourself up for success as you. Make sure to match the height of your turning chain with the stitches you’re using. Web to begin a second row of crochet using the slip knot method, follow these steps:
I go over how many chains to make at the beginning of the row, which stitch to start in. Reaching the end of the row: Once you have finished your first round of stitches, joined your two ends and made your starting chain, you will then skip the joining stitch and work your first stitch into the second to. Web to make the next row after you crochet the second row, chain one and turn. Web where to insert your hook when you crochet the second row.
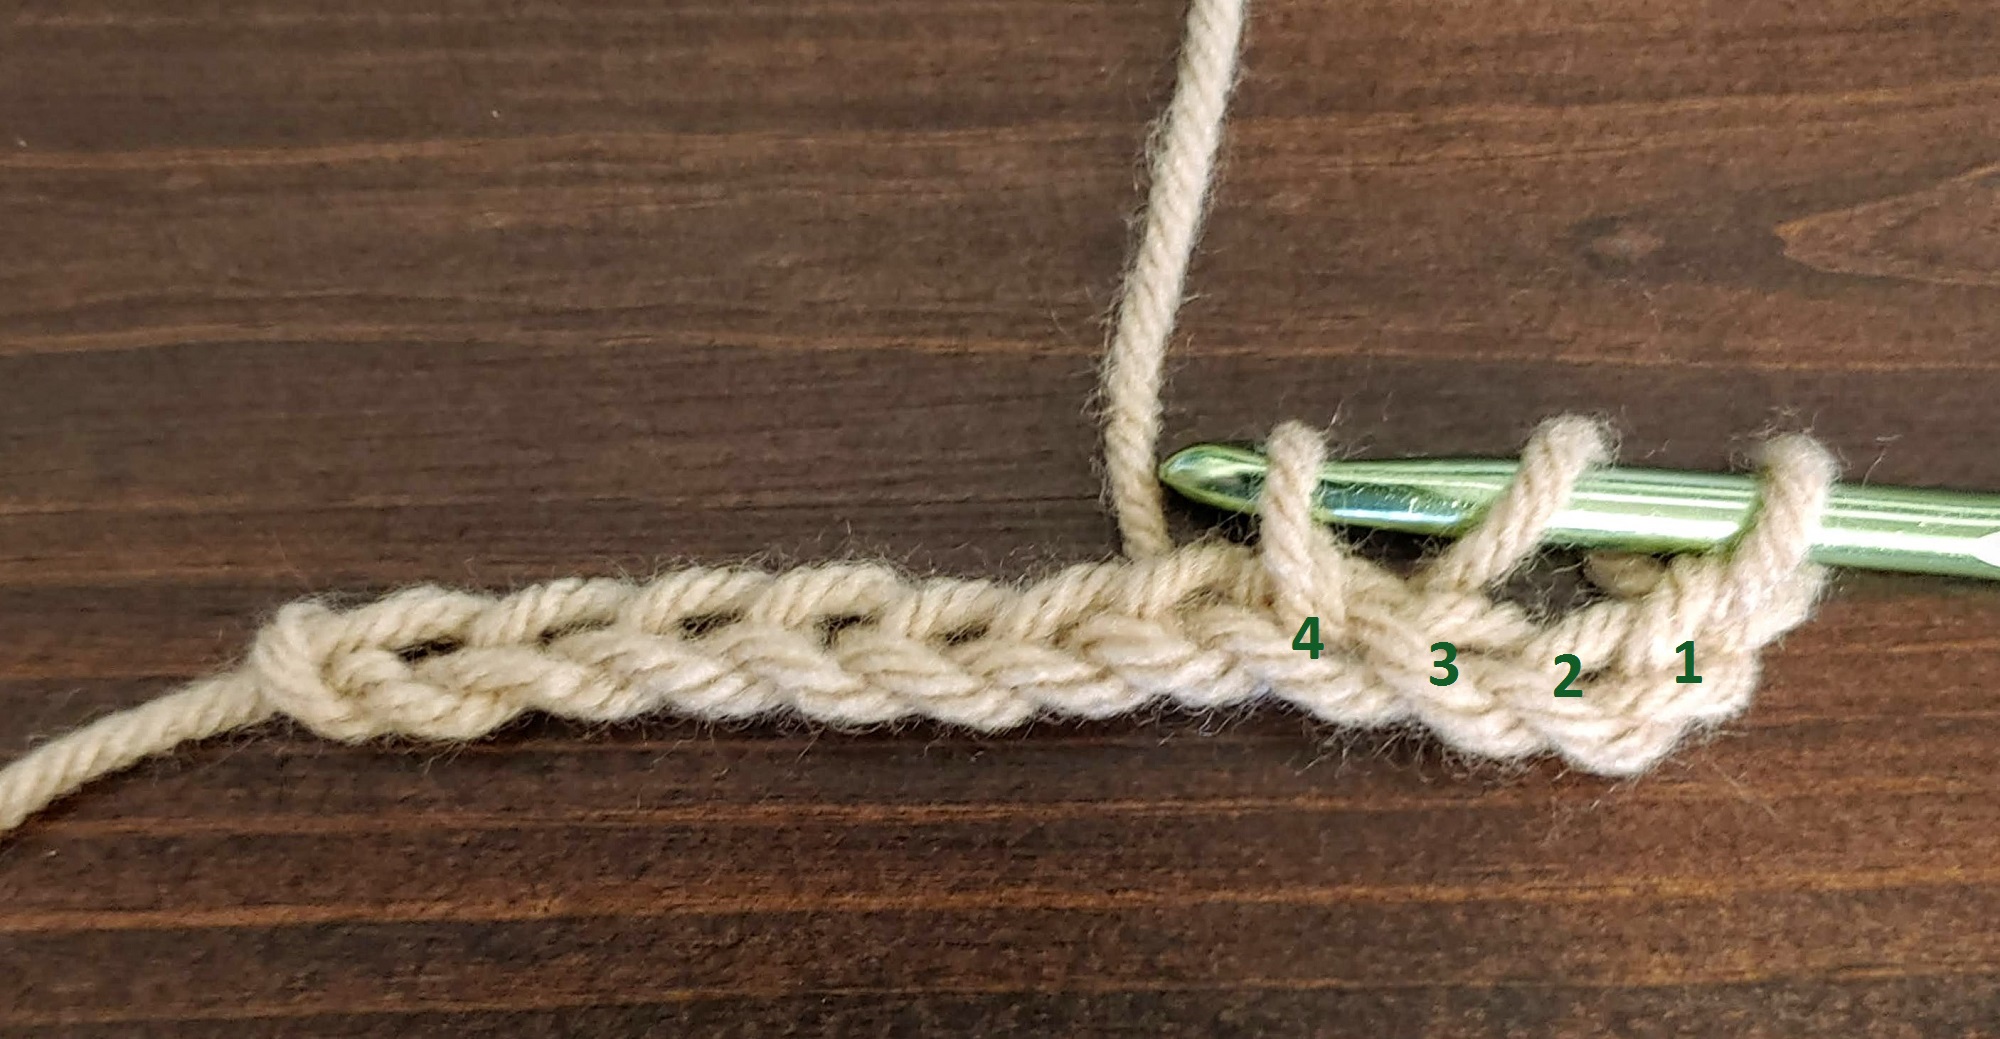
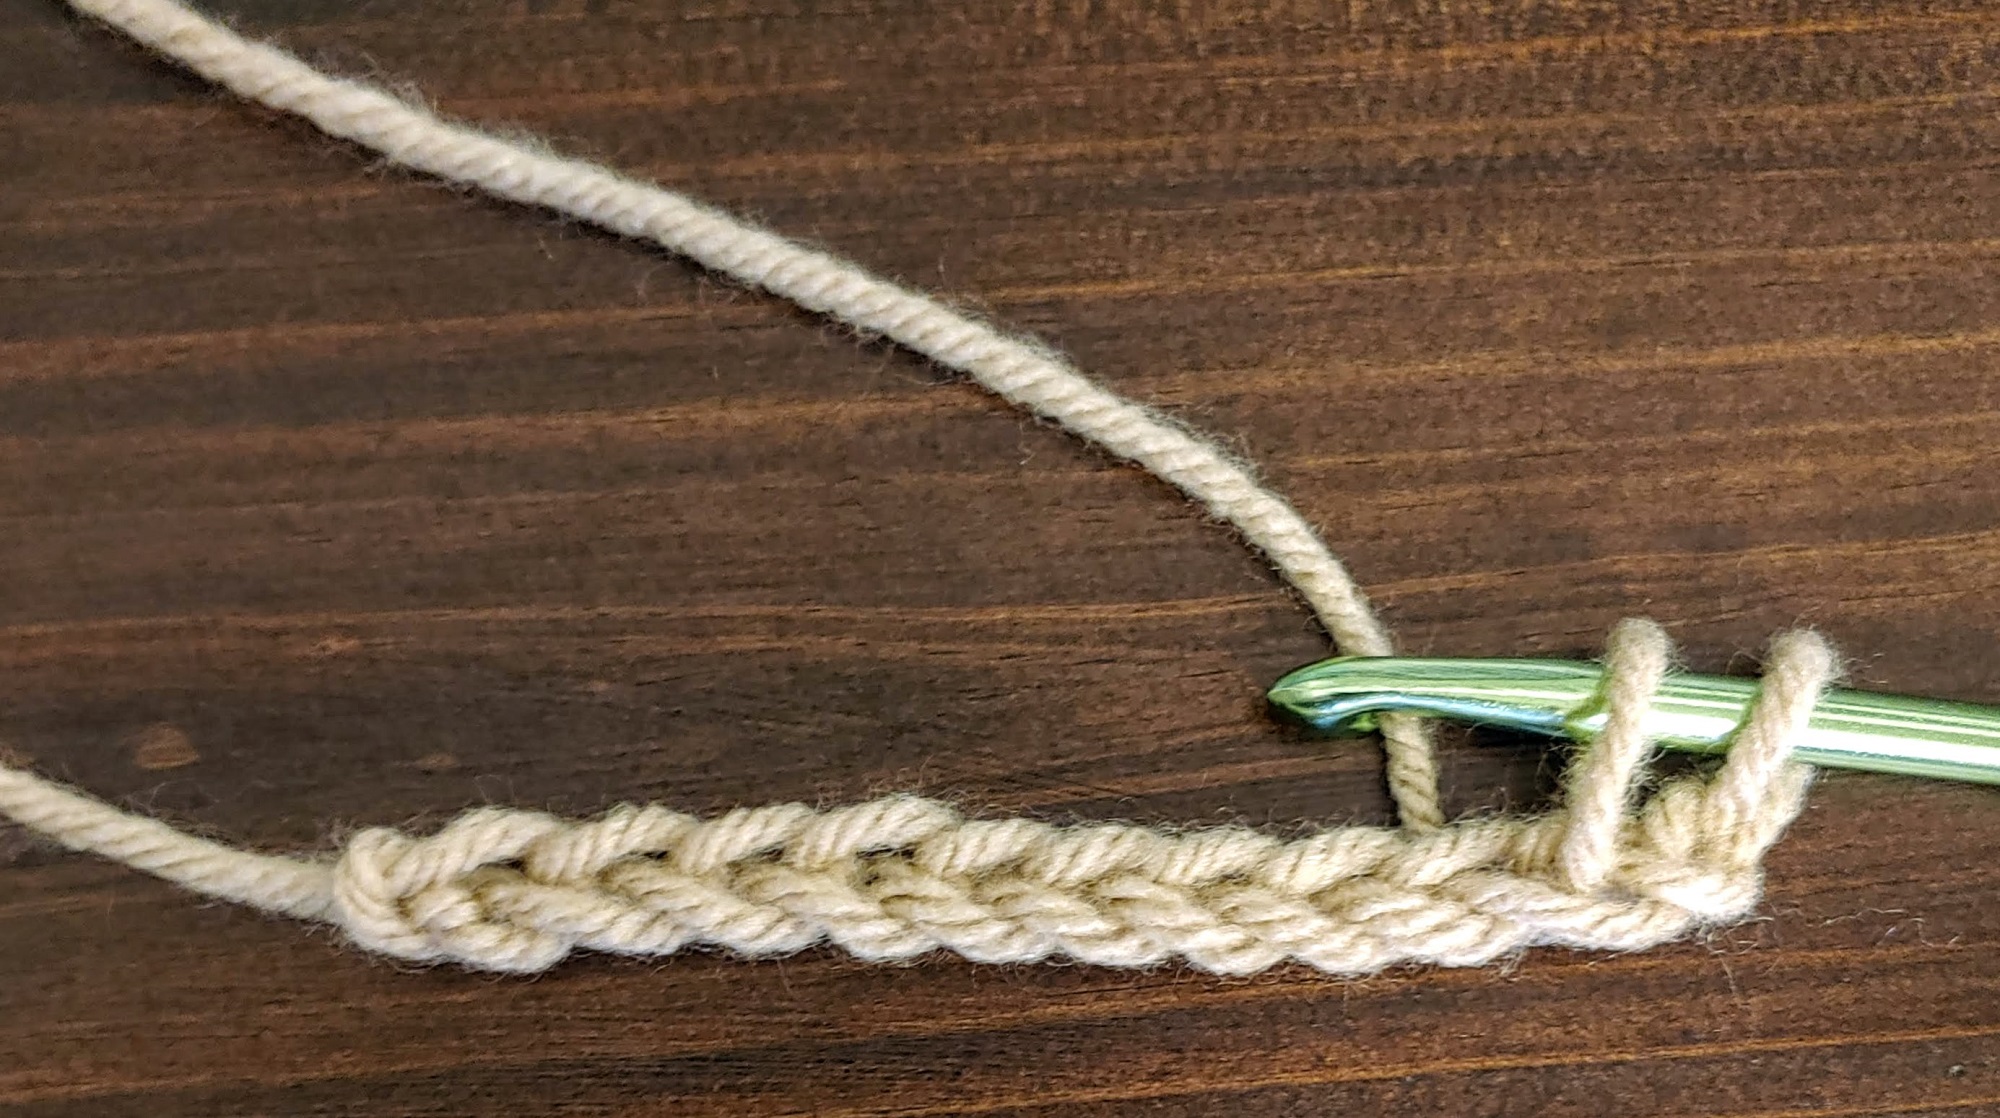
Insert the hook under the back loop of the second ch from the hook. Web where to work the first stitch. Once you have finished your first round of stitches, joined your two ends and made your starting chain, you will then skip the joining stitch and work your first stitch into the second to. Reaching the end of the row: By placing your hook in the correct position, you’re setting yourself up for success as you.
How to Crochet the Second Row of Stitches Beginner Crochet (2022)
Starting the Second Row of Crochet Working Into the Foundation Chain
How to Crochet the Second Row of Stitches Beginner Crochet
How to Crochet the Second Row of Stitches Beginner Crochet
Starting the Second Row of Crochet Working Into the Foundation Chain
Beginning the Second Row of Crocheting StepbyStep Guide and Tips
How to Move Up to your Second Row of Crochet YouTube

How to Start Second Row Crochet Master the Art with StepbyStep Guide
working the second row of single crochet YouTube
Starting the Second Row of Crochet Working Into the Foundation Chain
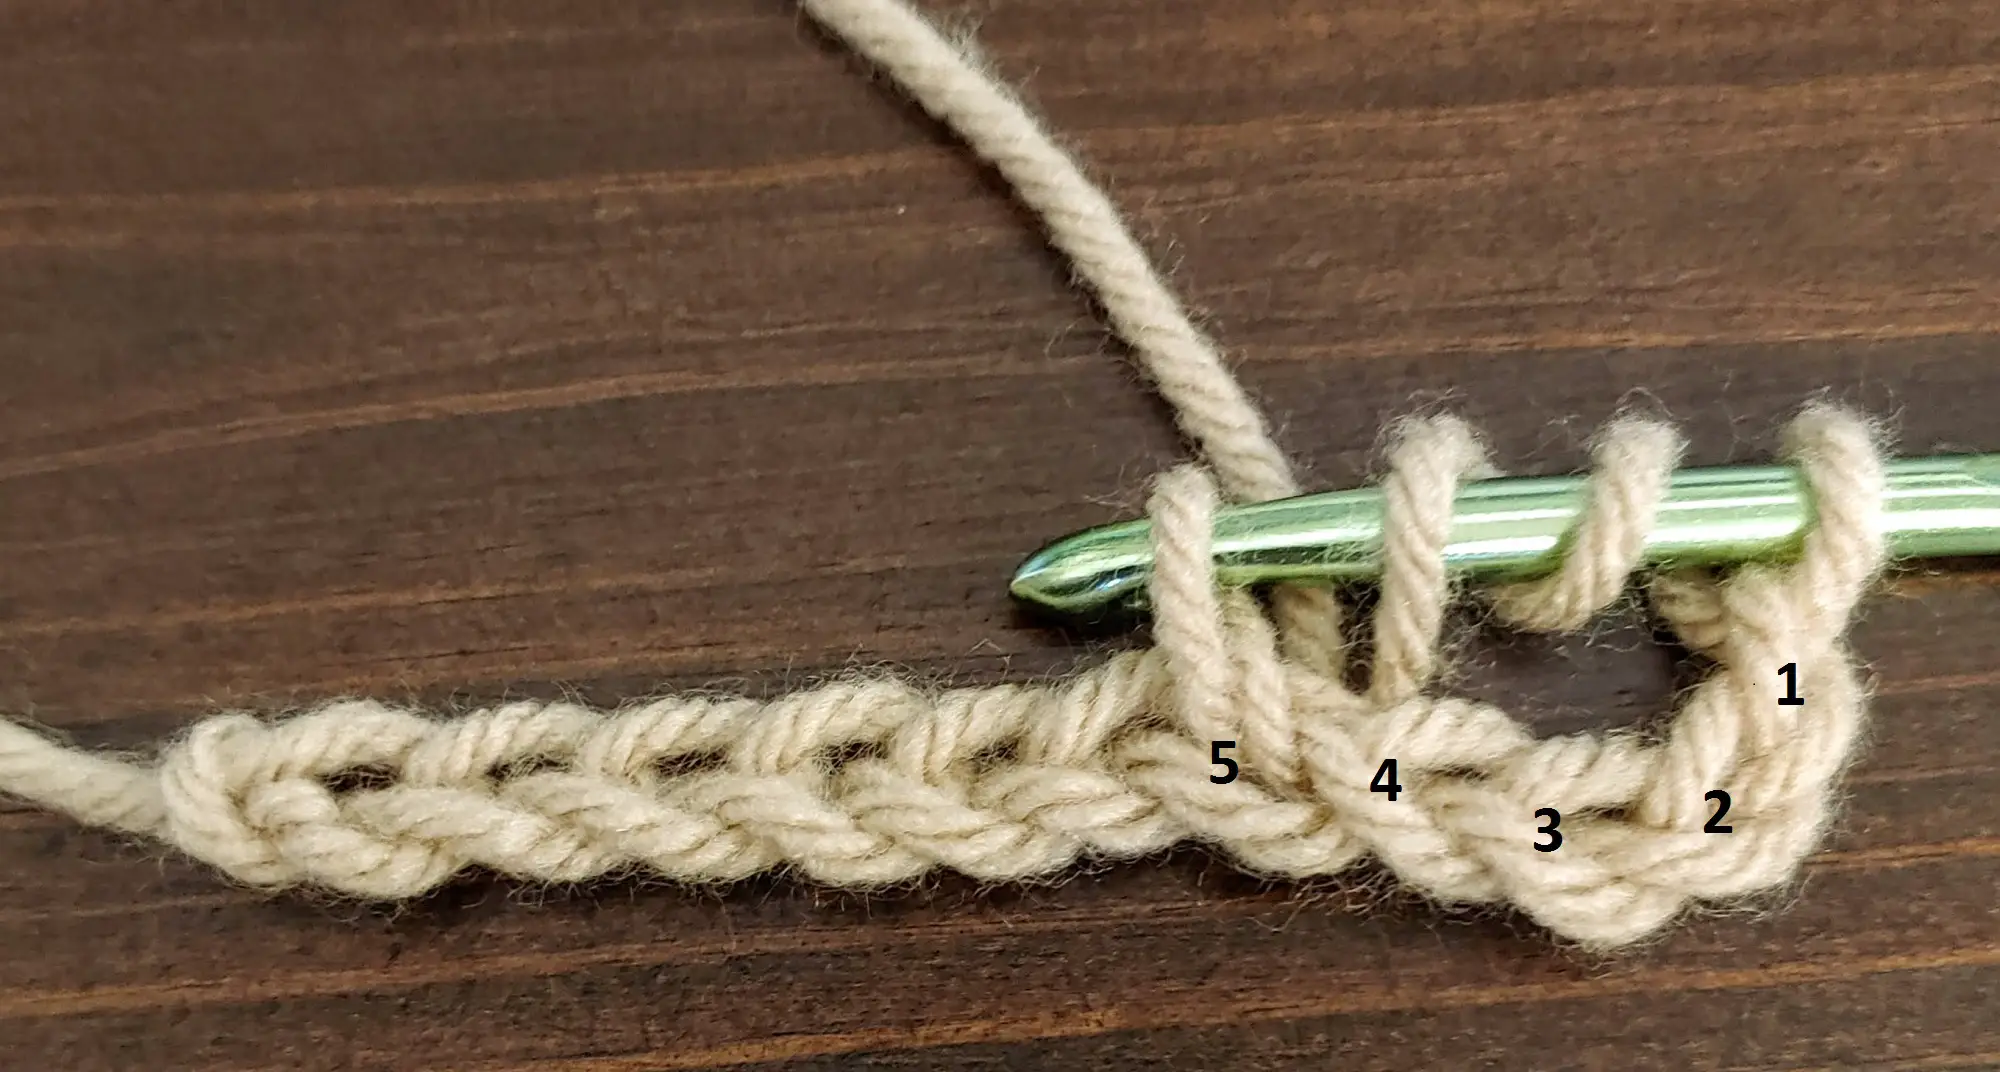
To start the next row, skip the first ch from the hook, unless otherwise written. Strive for consistency to avoid wonky edges. Crochet all stitches of this row through the back loops of the foundation chain: When starting the second row in crochet, ensure your hook is inserted in the top of the first stitch from the row below. Now, turn your chain so your hook is at the far right of the row to allow you to work from right to left (if you are a lefty, it is opposite). Make a single crochet swatch by following the steps in this lesson. Web where to insert your hook when you crochet the second row. If your work seems to curve or buckle, you may need to adjust your tension. Once you have this down, the rest of your project will follow more easily. Reaching the end of the row: Flip the work from right to left. Web to work the second row of single crochet, you need to turn the work counterclockwise, as shown in illustration 22a, so you can work back across the first row. (for reference, a turning chain is a number of chain stitches you make at the beginning of a row to bring the yarn up to the correct height for the next stitch.). Then, you insert the hook into the *second* loop, then single crochet the remaining 14 chains. Start a single stitch by pushing your hook through the loop of a chain.
Insert The Hook Under The Back Loop Of The Second Ch From The Hook.
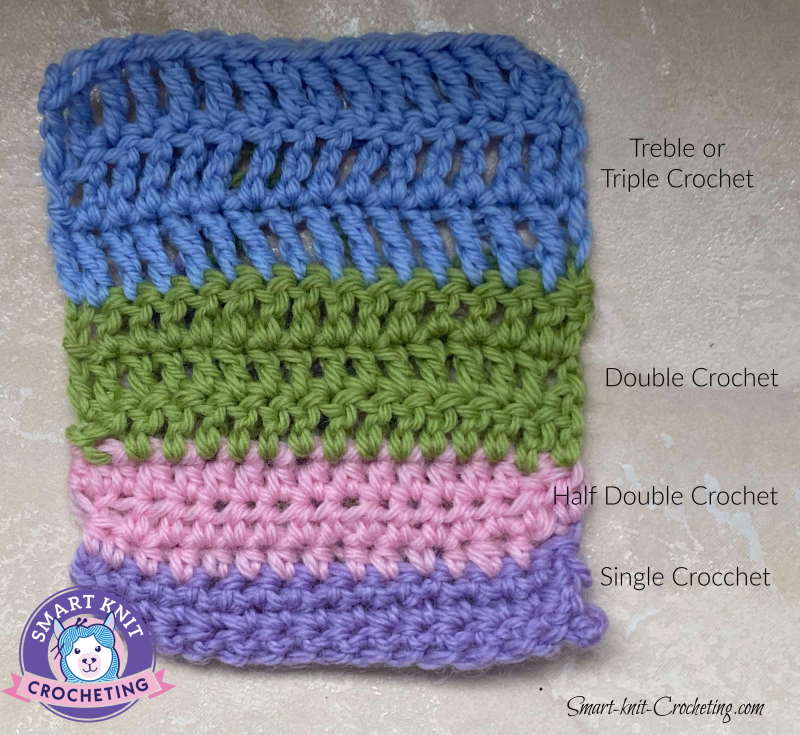
These techniques can create interesting textures and designs in your work. Under both top loops of the previous row: When you reach the end of the row, ch 1 and turn. Crochet the number of chains that corresponds to the number of stitches you want as your width.
Now, Turn Your Chain So Your Hook Is At The Far Right Of The Row To Allow You To Work From Right To Left (If You Are A Lefty, It Is Opposite).
Web discover creative second row crochet ideas to jazz up your projects and keep your fingers entertained. Web you are finished! Web crocheting the second row: When starting the second row in crochet, ensure your hook is inserted in the top of the first stitch from the row below.
Crochet All Stitches Of This Second Row Through The Back Loops Of The Foundation Chain.
Strive for consistency to avoid wonky edges. Do not remove the crochet hook from the loop as you do this (see illustration 22b). Then, turn your work so that the hook is facing the opposite direction. Web to start a new row of single crochet, make a turning chain of 1 chain stitch.
If Your Work Seems To Curve Or Buckle, You May Need To Adjust Your Tension.
This helps maintain an even and consistent appearance to your project. How to single crochet on the second row. Web where to work the first stitch. Once you've completed the foundation row, it's time to move on to the second row that establishes the pattern for the rest of the project.