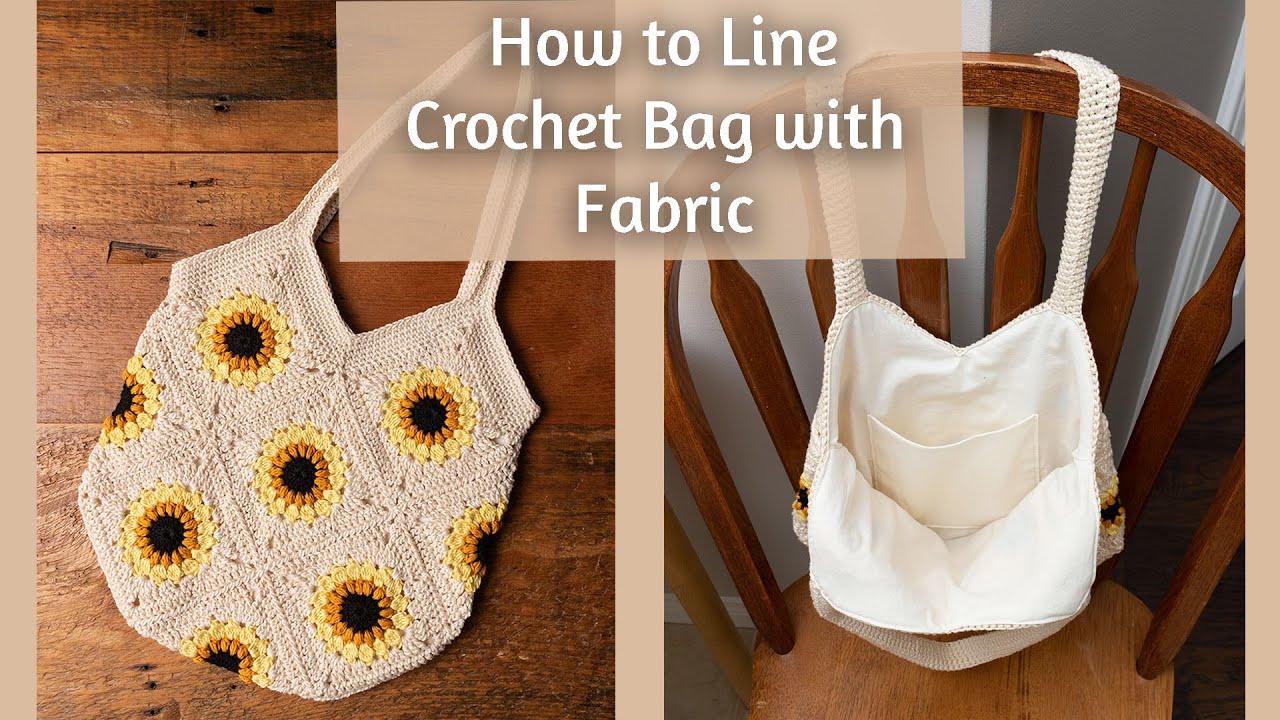
Web how to line a crochet bag free tutorial step 1: Then pin the sides of the fabric together and fold it in half and sew the sides together. Free returnssale ends todaylimited time offersave up to 90% on temu The additional width will allow for ¼” seams on each side plus some additional ease to allow for your crochet fabric to slightly stretch, as well as a generous ½” seam allowance at the top. This tutorial could easily be used to line a shoulder bag, market bag, or any other type of crochet purse that you desire.
Web how to line a crochet bag free tutorial step 1: If you want an inner pocket, cut two pieces of fabric to the desired pocket size plus 1/2″ for seam allowance around all sides. Mark onto the fabric where your opening starts and ends. It’s best to choose a lining that’s a weight similar to your bag. Web how to line a bag:
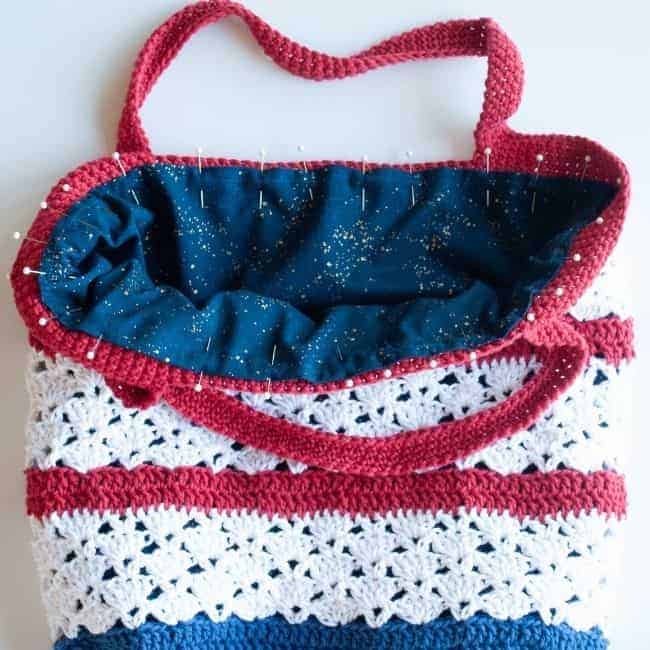
Mark onto the fabric where your opening starts and ends. Web lay your bag flat and make sure the straps are lined up. Just make a few stitches at the right length for your project and hide the extra bit between the lining and the crochet layer! So lining your crochet or knit bag is a way to protect your bag. Web learn how to line a crochet bag in this simple and quick tutorial as we walk together through the steps to line a tote bag.
How to Line a Crochet Bag {StepbyStep Instructions} Crafting Each Day
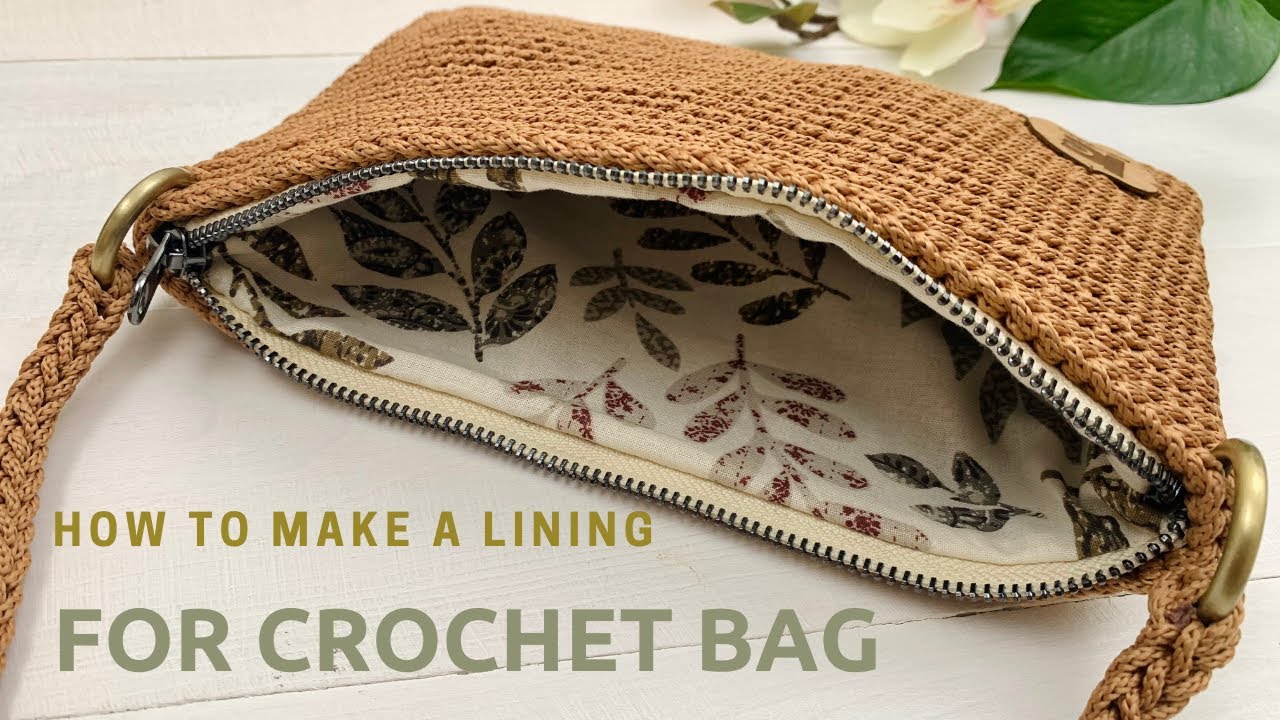
How to sew a lining into a crochet bag/ how to make a zipper lining
Tutorial How to Line a Crocheted Bag Pattern Paradise

How to Line a Crochet Zipper Bag StepbyStep Tutorial
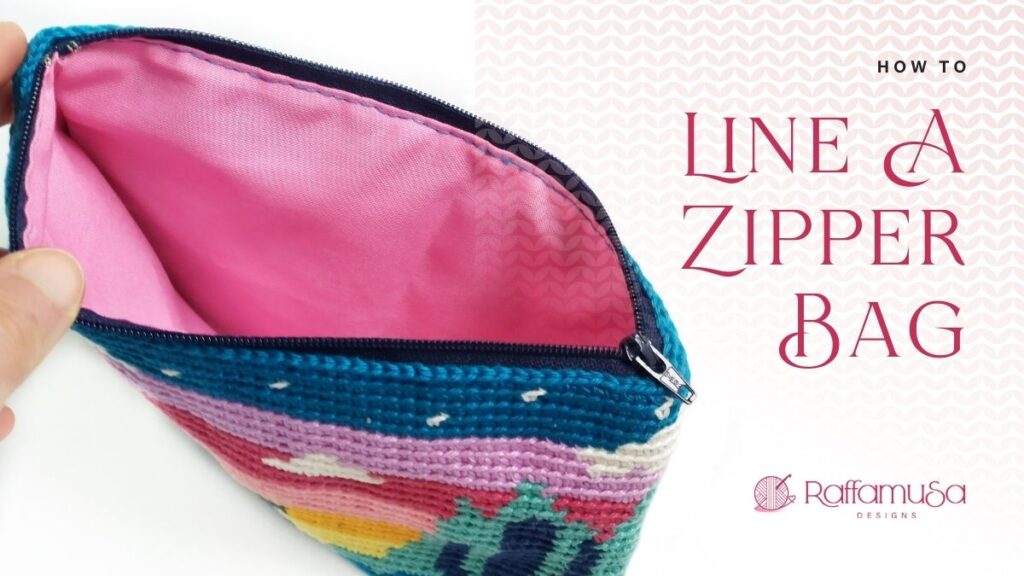
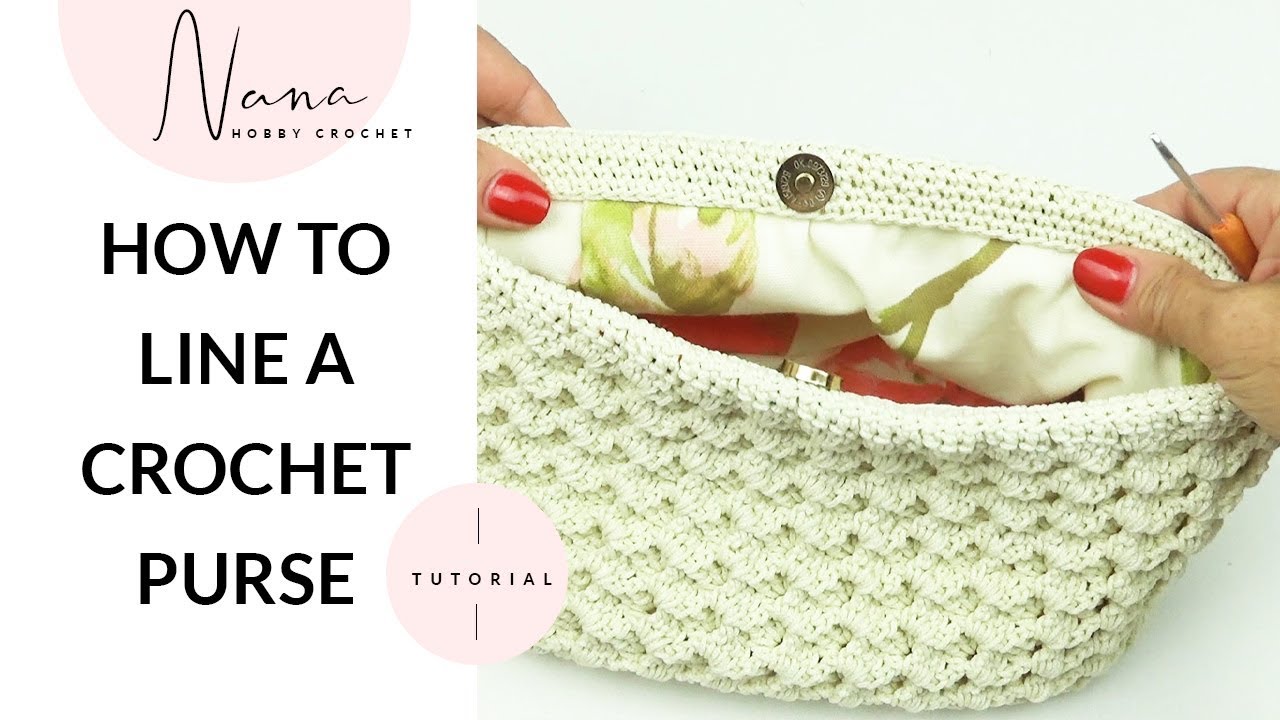
How to insert a zipper and line a crochet purse tutorial

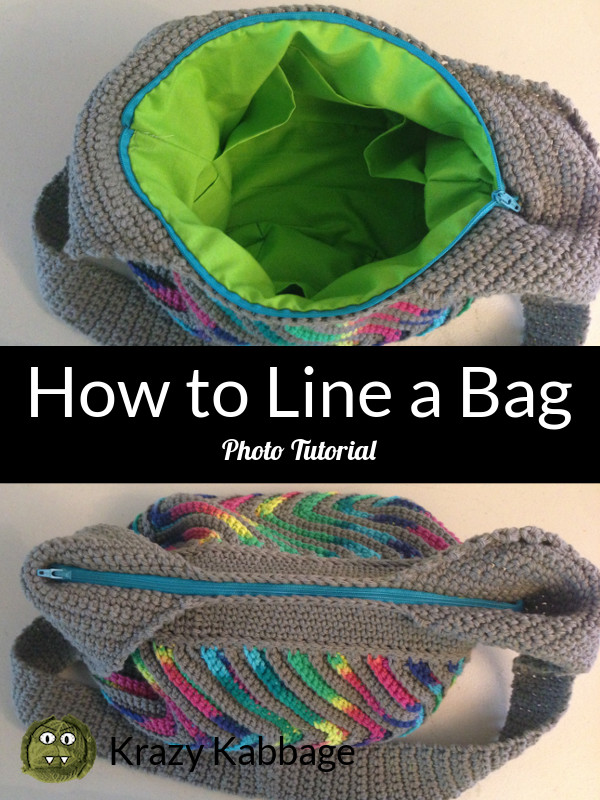
How to line, add pockets and a zipper to a crochet bag Krazy Kabbage
How to Line a Crochet Bag YouTube
HOW TO LINE A CROCHET TOTE BAG YouTube
Lining a Crochet Purse CrochetNCrafts

Tutorial How to Line a Crocheted Bag Pattern Paradise

Then i can generally follow the line of that row of stitches around the. This tutorial could easily be used to line a shoulder bag, market bag, or any other type of crochet purse that you desire. How to line your knit projects & crochet projects. If you want an inner pocket, cut two pieces of fabric to the desired pocket size plus 1/2″ for seam allowance around all sides. Web 9) pin the fabric lining into the crochet bag and hand sew in place. With right sides together, sew around three sides, turn right side out, fold in the seam on the 4th side and sew in place (the pocket will be double thickness). But how do you even get that lining in there? In fact a friend of mine and i were recently talking about how it can hide ends that you don’t want to weave in if you do some color work in the center of a piece. Looking at the top edge of the bag, follow the line between the last and next to last row of crochet stitches and place stitch markers at each side of the bag. This is my first try at making a tutorial, so i hope that it is helpful!if you have any questions a. Pin top edges, lining up the lining and purse so that the lining fills up the bottom and sides of bag and the top edge is about 1/2″ below the top edge of the bag. Just make a few stitches at the right length for your project and hide the extra bit between the lining and the crochet layer! Web lining a crocheted bag has many benefits: Web how to line a crochet bag free tutorial step 1: Slip lining into fabric purse.
Web Attaching The Lining To The Granny Square Purse.
Web learn how to line a crochet bag in this simple and quick tutorial as we walk together through the steps to line a tote bag. Web this tutorial shows you how to line a crochet bag of any shape! You can do this by folding your fabric in half with the backside of the fabric facing outwards. Web how to line a bag:
Web Watch And Learn How To Add A Fabric Lining To Your Crochet Bag.
Cut your fabric to your bag’s dimensions, adding an additional ¾” in width and ½” in length. Web 9) pin the fabric lining into the crochet bag and hand sew in place. The granny square tote bag is a unique shape, which might seem difficult but is actually very easy. Free returnssale ends todaylimited time offersave up to 90% on temu
4.5/5 (25K Reviews)
Just make a few stitches at the right length for your project and hide the extra bit between the lining and the crochet layer! Web how to line a crochet bag free tutorial step 1: Web step by step photo tutorial on lining a crochet bag. This is my first try at making a tutorial, so i hope that it is helpful!if you have any questions a.
Line The Ends Of The Zipper Up With The Stitch Makers.
I’m going to show you how to line both in today’s video! Web a crochet or knit bag is lovely but sometimes we love to overstuff the bags and it causes it to misshape or just ruin it. Turn lining so that the right side is on the inside and the wrong sides are facing out. With right sides together, sew around three sides, turn right side out, fold in the seam on the 4th side and sew in place (the pocket will be double thickness).