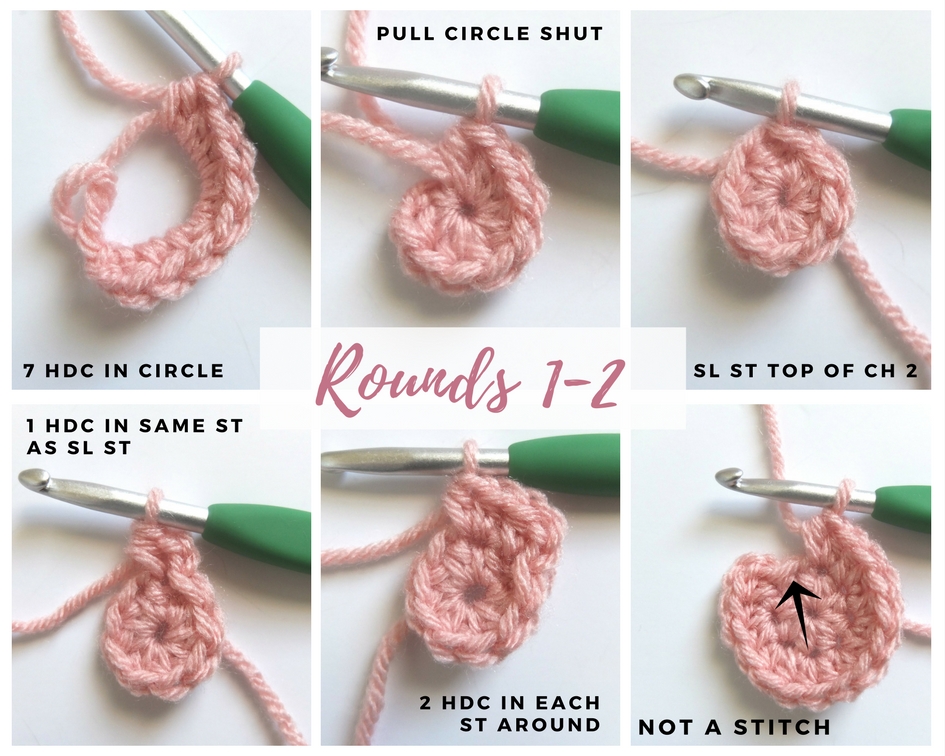
When crocheting in rounds, like top down beanies, you want a straight seam when you slip stitch to the first stitch. Web instead of confusing you with every iteration of working in the round, this post offers only 1 demonstration: I find this method the most versatile and a great place. 4 granny clusters] fasten off and cut contrast color a. Web skip to 3:11 for the tutorial portion.in this video, i demonstrate how joins are made in rounds for amigurumi crochet patterns that call for joining.
While garrett crochet has been a popular trade candidate heading into the deadline, the red sox are one team that doesn’t appear. Web this video shows you how the technique to invisibly join your crochet rounds, without extra stitches or fuss. Say goodbye to seams and wonky edges. You simply crochet continuously in a spiral. We will also learn how to start a project in the round using the chain method.
For instance, “slip stitch in the first stitch to join.” At the beginning of each round, one or more chain (s) can be worked to match the height of the following stitches—this is equal to a turning chain. One method is the most common, basic method for joined rounds, while the second method was developed by june of planetjune. Crocheting circles allows you to: When working in double crochet, three starting chains are required.
How to Single Crochet Flat Circles in Continuous Rounds Crochet

how to crochet joined rounds YouTube

Crochet Joining in the Round YouTube

Crochet Joining Round Tutorial · How To Make A Crochet · Yarncraft on

Joining in the Round Crocheting 101 Chapter 10 Part 3 YouTube

How to Crochet in Joined Rounds Learn to Crochet LESSON 10 YouTube

How to Crochet in the Round A StepbyStep Picture Tutorial Sigoni
Crocheting in the Round Joined Rounds

Crocheting in the Round Joined Rounds

How to Crochet in Rows, Spiral Rounds and Joined Rounds Supergurumi
Insert the hook into the first chain made. Learn how to join crochet rounds without a slip stitch, and minimize that seam! Web this crochet tutorial shows how to crochet the perfect straight seam every time. Continuous rounds (no joining required) and joined rounds (joining required). When crocheting in rounds, like top down beanies, you want a straight seam when you slip stitch to the first stitch. Each round will then typically start with a chain 1 before starting your single crochet stitches. While garrett crochet has been a popular trade candidate heading into the deadline, the red sox are one team that doesn’t appear. That means, at the start of each round, you chain one, and then slip stitch into that chain at the end of the round. While working in continuous / spiral rounds, we keep crocheting round and round continuously. Web this tutorial is about working in continuous / spiral rounds. We will also learn how to start a project in the round using the chain method. For instance, “slip stitch in the first stitch to join.” To make this stitch easier to see for subsequent rounds, you may want to add a stitch marker here. Web there are two main ways to crochet in joined rounds: Crocheting circles allows you to:
Lay The Potholder Flat And Line Up The Front And Back Stitches.
Make a slip stitch to join the chains into a ring. One method is the most common, basic method for joined rounds, while the second method was developed by june of planetjune. Web to crochet in the round, attach your yarn to your crochet hook with a slip knot, then crochet a chain of four stitches to form the center of the circle. The continuous round requires no chaining at the start or slip stitching to join and complete rounds.
That Means, At The Start Of Each Round, You Chain One, And Then Slip Stitch Into That Chain At The End Of The Round.
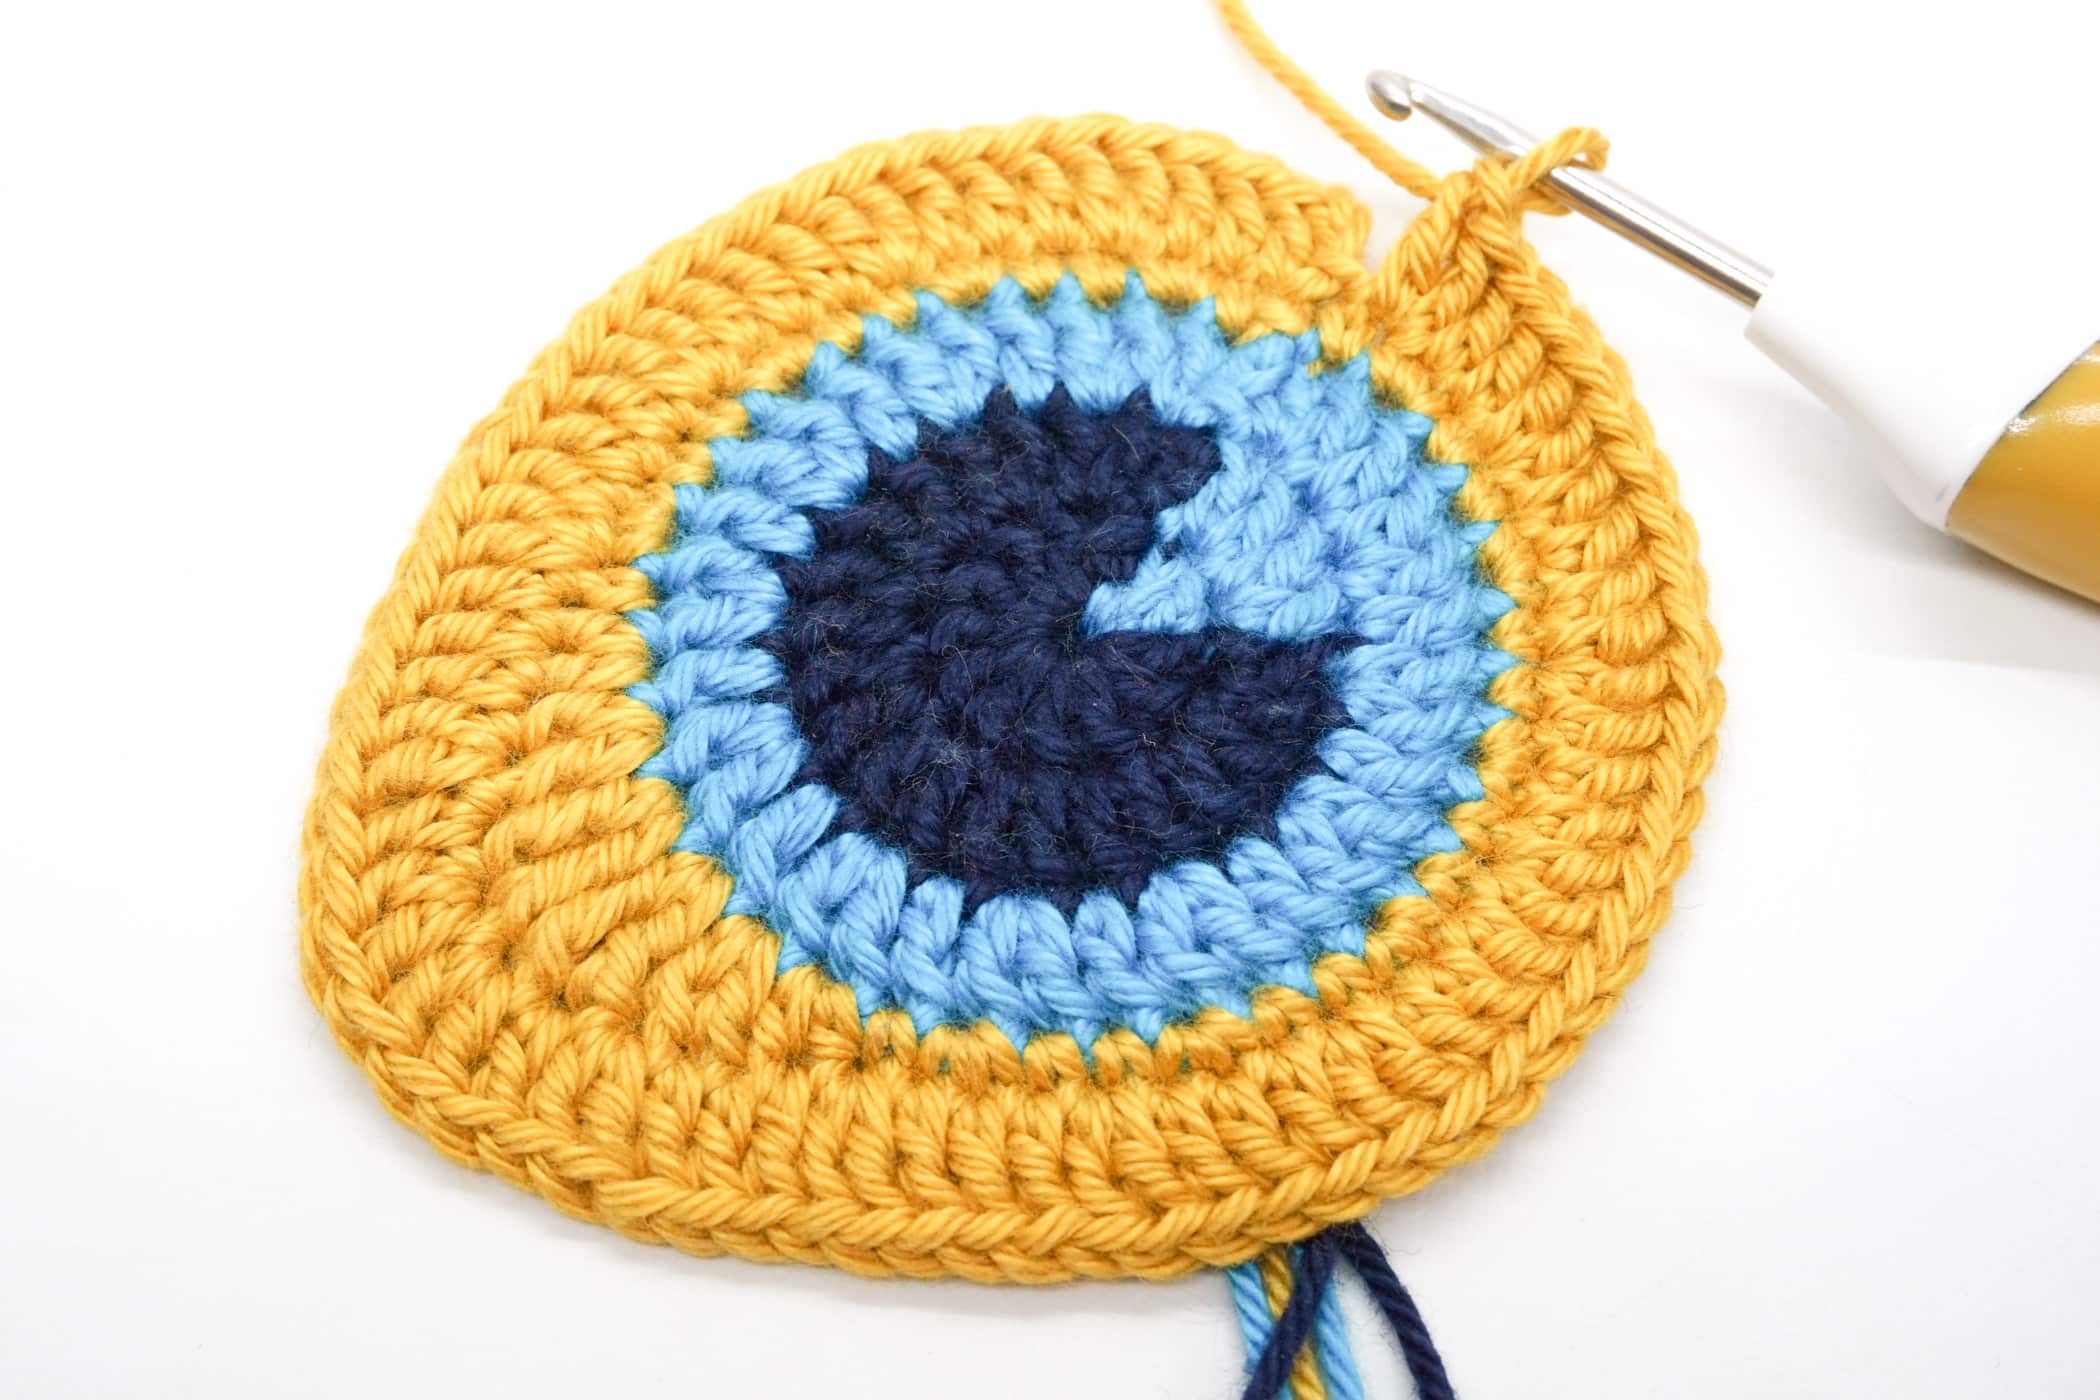
Joined rounds are achieved by ending one round with a slip stitch, and then moving on to the next round. You can tell that there is a difference in gauge here. Web crocheting the potholder closed: Next, make a slip stitch in this first chain to form the four chains into a ring.
I Will Also Show You How To Make A Single Crochet In A Single Crochet (Sc) Stitch.
I have learned two different ways to make joined rounds in amigurumi. Web in lesson 10 part 1 we will be learning how to crochet in joined rounds. With colour a (b), ch 1; Say goodbye to seams and wonky edges.
Web How Do You Crochet Joined Rounds In Amigurumi?
Web here is the written pattern & some helpful tips for crocheting joined rounds: Just use the chainless starting single crochet as the first stitch in each round, and join with the invisible slip stitch as shown in. Here i show you how! Web the solution is to crochet in joined rounds.